Deploy a React Native App on Google Play Store using the Expo


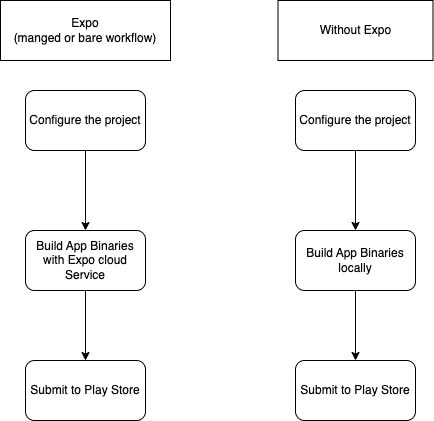
We will be seeing the deployment of two kinds of React native apps. One that is managed by the expo and the other which is not managed by the expo. The expo-managed app can be managed or bare workflow.
Expo managed apps
Configuring app names and version
We change the app name in the app.json file appropriately because this is what will appear to the users once they install the app and see it on the home screen.

Now comes the version,

The version which is in the root object is the user-facing version. That's the version user will see in the app store as the version of the app. So if we release a brand new version of the app, with major changes it would make sense to change it to 2.0.0 and so on whereas minor changes can be set as 1.0.1 or 1.1.0, depending upon the kind of changes.
Apart from these version codes, there are two other important versioning android.versionCode/ios.buildNumber represents the developer-facing build version.
These are the android-specific configuration that is done, inside this object.
"android": {
      "versionCode": 2,
      "adaptiveIcon": {
        "foregroundImage": "./assets/adaptive-icon.png",
        "backgroundColor": "#ffffff"
      },
      "package": "com.imf_ali.ChatAI"
    },
Icons and Splash screen
To set up our own icon and splash screen, we go inside the assets folder and place our png or jpeg files of the icon and splash screen. There are a number of tools online which can generate these images or we can also make one with Adobe tools. The app icon should be 1024px by 1024px image.
We update the following key values in app.json
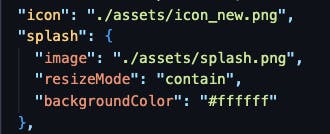
The great thing about the expo is under the hood when we build our app using the expo cloud service, they will produce different icons based on our input icons for different devices and device sizes. If we ever build an ios or Android app without react native or without Expo then we realize we need multiple versions and multiple sizes of one in the same icon if we wanna publish and build our app using Xcode or Android Studio because we want to target different devices with different resolution.
Building expo apps with EAS
Preresiquite
React Native App (which I assume you already have)
Create an expo account for free (https://expo.dev/signup)
Now follow these steps to create the build
- Install the EAS CLI
npm install -g eas-cli
- Login to expo
eas login
- Configure your project
eas build:configure
Once we run this command we see an eas.json file generated.
Now we create a build that would be consumed by Google Play Store. The default format of which is Android App Bundle(AAB/.aab). We would like to test the build in our local first. To install a build directly to your Android device or emulator, you need to build an Android Package(APK/.apk) instead. To generate apk we need to modify eas.json by adding the android object inside of the preview object.
 "preview": {
     "android": {
         "buildType": "apk"
     },
     "distribution": "internal"
 },
Now we can generate apk file with the following command
eas build -p android --profile previewTo create the production build, we can generate with the command
eas build --platform androidIf you have not yet generated a Keystore for your app, you can let EAS CLI take care of that for you by selecting
Generate a new Keystore, and then you are done. The keystore is stored securely on EAS servers.If you want to manually generate your keystore, please see the manual Android credentials guide for more information.
To submit the app to the play store, we use the command
eas submit -p androidThe command will lead us to step by step process of submitting the app. It will also prompt a path of the Google Services JSON key if
serviceAccountKeyPathis not added to the eas.json file.The summary of the configuration is displayed and submission starts. Once our submission is done, we can see the build visible on Play Store. If something goes wrong, it would be displayed on the screen.